
Valet – Laravel – Mysql – Phpmyadmin
Here are some helpful tips that I have gathered while trying to install valet in my project. I faced so many problems just trying to use valet. But you don’t need to ?. I am going to share all what I have learn in this blog.
Update Valet Version
In order update valet version, you will need to remove it first. Below you can see the commands to remove it completely from your machine if you have already installed. It is good idea to remove it first because you might be using lower version of valet and thus facing lots of problem.
// To remove valet
composer global remove laravel/valet
PHP Version
I am using php version to 7.3 by using following command. You may use any version you want. Better if you use the latest one.
// To link php version to 7.3. You can link any php version you want.
brew link [email protected] --force --overwrite

// To update php version
brew upgrade php

// Now set to latest version. replace with latest version by x.
brew link [email protected] --force --overwrite

// Try these if you are stuck switching php versions.
brew uninstall php
brew uninstall [email protected]
brew uninstall [email protected]
brew uninstall [email protected]
brew cleanup
brew services cleanup
sudo brew services cleanup
brew doctor
brew update
brew install php
valet install
How to check which shell you are using?
You can type the following command in your terminal to see which shell you are using:
echo $0
PHP linking issue
You can link to any php version you want. It is always recommended to use the latest version. But sometime, you might need to downgrade it. So, here are the steps you can follow to link to different php version.
brew link [email protected] --force --overwrite
echo 'export PATH="/usr/local/opt/[email protected]/bin:$PATH"' >> ~/.bash_profile
echo 'export PATH="/usr/local/opt/[email protected]/sbin:$PATH"' >> ~/.bash_profile
source ~/.bash_profile

// See the list running starting with the work php.
brew list | grep php

// To see what are the services running.
// Make sure php is running.
brew services list

Php Link Issue: Solution
If you get some issue like this php install php71 dyld: Library not loaded: /usr/local/opt/openldap/lib/libldap-2.4.2.dylib, then just run following commands.
brew update
brew upgrade
Other note:
- If you encounter platform issue as follow, run
composer global update
Fatal error: Composer detected issues in your platform: Your Composer dependencies require a PHP version ">= 8.0.2". You are running 7.4.27.
Installing Valet
Let’s install valet. Use the command mentioned below. Adding -vvv shows detail information what is going on with the installation. You can ignore -vvv if you don’t want to see in detail.
composer global require laravel/valet -vvv

// Install nginx too if you don’t have it.
brew install nginx

// Start nginx server if it is not running somehow.
brew services start nginx
Sites not responding
I hope installing valet was not that hard. I was struggling to use valet because I was not using the latest version of valet. But once you install the fresh version, there wont be problem using valet command. But once you install valet and try to link your project using valet link your_project, is your site not responding? Well, that is exactly what I faced too ?. So don’t worry, your and mine problem is the some one.
This linking issue is due to dns connection. So to make sure dns is working correctly following following commands.
// Install
brew install dnsmasq

// Restart dnsmasq
brew services restart dnsmasq

// Now Install valet again.
valet install

// Test from terminal
dig website.test
Once you follow above commands, you will be able to see link your project using valet command and the website will be visible in your_website.test. You can always change your domain extension name by the command valet domain new_name. But note, the domain extension should not be similar with live domain names like .com .net .site .tk and such others. I hope you got it.
Park
Parking is a great feature provided by valet. So, I recommend you to use it. Basically, you won’t face issue on park. But as I was not aware what it does, I am trying to explain what it does so that you will also know if you don’t know yet ?.
First, go to your project location where you save all of your laravel projects. Now run following command. Once the command is executed, all projects under that folder will run automatically just by appending .test name after the project name.
cd /path/to/your/project
valet park

// If you want to link inidividually
cd /path/to/your/project/website
valet link website

// To see list of linked sites.
valet links
Mysql setup
Setting up mysql is quite tricking part. However, it depends based on your machine configuration. I faced lots of error. But finally I was able to setup mysql.
1) Download MySQL Community Server
Download latest MySQL version from this link. It is best to download this file and setup in your computer rather than going through brew install mysql and brew services start mysql. I have tried 10-20 times to make it work from terminal. However, I was not able to make MySQL run. So, don’t waste your time and just install the latest version of MySQL software and install it.
2) Install MySQL Community Server
You might be thinking why a step to install MySQL but I believe you will try to search for it if you are trying to install in Mac. Once you download .dmg file and try to start install clicking .pkg file, you might see something like this as shown in image below.

The solution to this issue is very easy. Instead of double clicking .pkg file, right click the file and click Open as shown in image below.

Now you will prompt with new popup. Click Open button and now you will be able to continue with setup process.

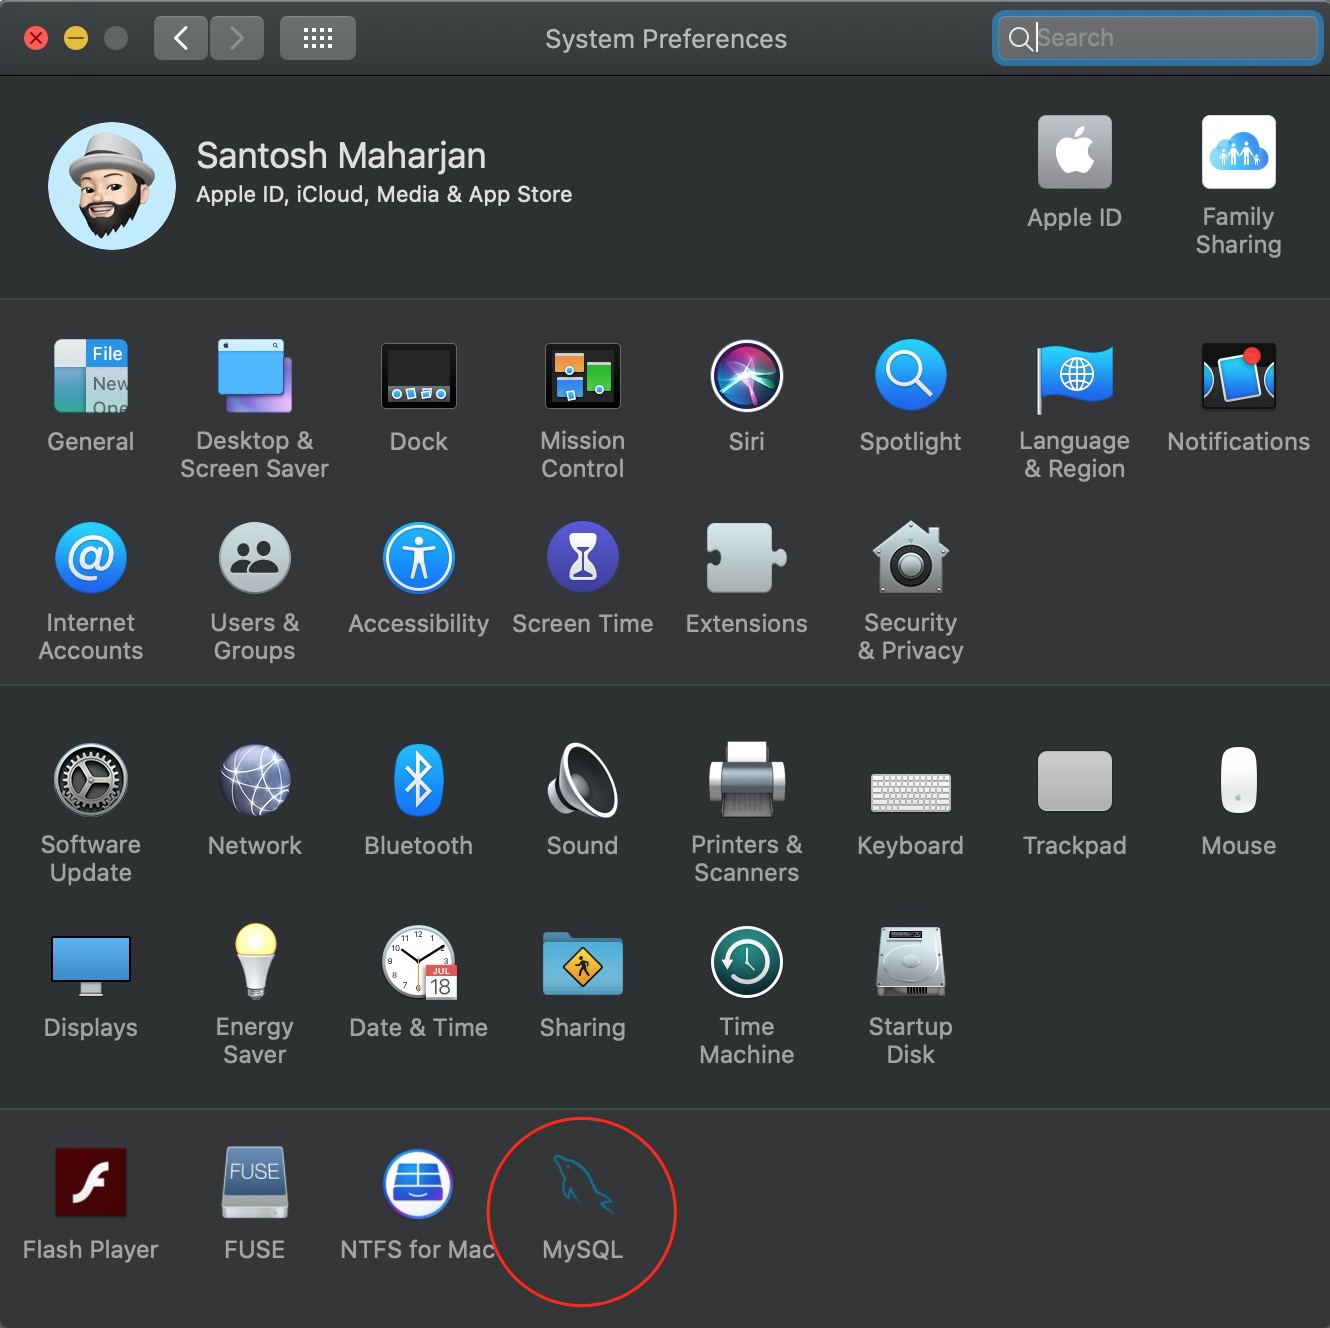
3) Start MySQL
In your preferences, click MySQL and start MySQL
4) Setup MySQL
Run mysql_secure_installation command in your terminal to setup root password and complete other setups as well based on your requirement.
5) Create user and password
You must be able to access mysql command now. Here are the steps you should follow to create user and database. Remember, if you type caching_sha2_password instead of mysql_native_password, you won’t be able to communicate with database.
6) .env file setup
First you will need to find where is mysql.sock file located. To do so run netstat -ln | grep mysql command and you will see the location. In my case, it was in /tmp/mysql.sock. Now copy this path and paste it in your .env file as shown in image below.

Phpmyadmin setup
Setting up phpmyadmin is very easy. Please follow these steps.
- Download
phpmyadminfrom this link. - Now extract that file to the location you want to save.
- Goto to
phpmyadminfolder and typevalet link phpmyadmin. - Now you can access
phpmyadminjust by typingphpmyadmin.test - Type mysql username and password we set above and you are good to go.
Migration
Everything is done till here. So just type php artisan migrate and you will be able to run migration without any issue
Conclusion
I hope this was helpful. I struggled a lot just to run migration code using valet. Finally I was able to accomplish. If this doesn’t work, let me know. I will try to help you.
Thank you.